Here I am with another recipe for you to add to your recipe box and to share at an upcoming cookie exchange! How about some winter mittens iced cookies? If you are looking for other ideas be sure to see the others I posted – holiday presents and snowman faces! Winter Mittens Iced Cookies PDF recipe
This post contains affiliate links, and I may be compensated for any purchases made via that link. GeminiRed Creations disclosure policy.

Cookie Ingredients:
- 5 C flour
- 2 tsp baking powder
- 1 tsp salt
- 1-1/2 C soft unsalted butter
- 2 C granulated sugar
- 4 eggs
Cookie cutter:
You can grab a set of 3 different sized mitten cookie cutters over at Amazon!
Icing Ingredients:
- 2 egg whites
- 1 C powder sugar
- 1/2 tsp cream of tartar
- Pink & red gel food coloring
Cookie Directions:
- Cream the soft butter with the sugar until the combination is smooth not grainy to the touch in a mixing bowl.
- Add all 4 eggs at one time…Continue to mix.
- Add the vanilla. Continue mixing.
- Sift the flour, baking powder, and salt together.
- Add the dry mixture to the wet mixture.
- Continue mixing to make sure all ingredients are thoroughly blended.
- Make the dough into a ball, wrap it in cling wrap completely covering the entire dough ball.
- Put in the refrigerator for about 6 hours or overnight. Check to see if the dough is firm.
- Preheat oven to 325 degrees.
- Pull the cookie dough out of the refrigerator and sit it out to soften up a bit.
- Put flour out on the wood cutting board, rub flour on the rolling pin, and work some flour into
the batter. (if needed) - Roll the dough out on the cutting board and using the cookie cutter begin to make your cookies.
- Line the cookie sheet with parchment paper.
- Using a metal spatula move the cut cookies to the parchment lined cookie sheet.
- Bake at 325 degrees for 8 minutes. Check to see if the cookies are thoroughly baked.
- Take the cookies off of the cookie sheet and put on a wire rack to cool completely.
(About 10 minutes).
Icing Directions:
- Combine all ingredients in a mixing bowl mixing on medium speed for 4 minutes. (except your food coloring)
- If icing is not stiff enough add 1/4 C powder sugar.
- Take out 1 TBSP of icing and add several drops of red gel food coloring. Mix to blend the color.
- Put the remaining icing into a bowl. Take out 1/4 of the icing and keep it white.
- The rest of the icing add several drops of pink gel food coloring. Mix to blend the color.
- Spoon each color of icing into individual frosting bags with a #2 tips. Twist the open end of the bag to push the icing to the tip.
Basic Directions:
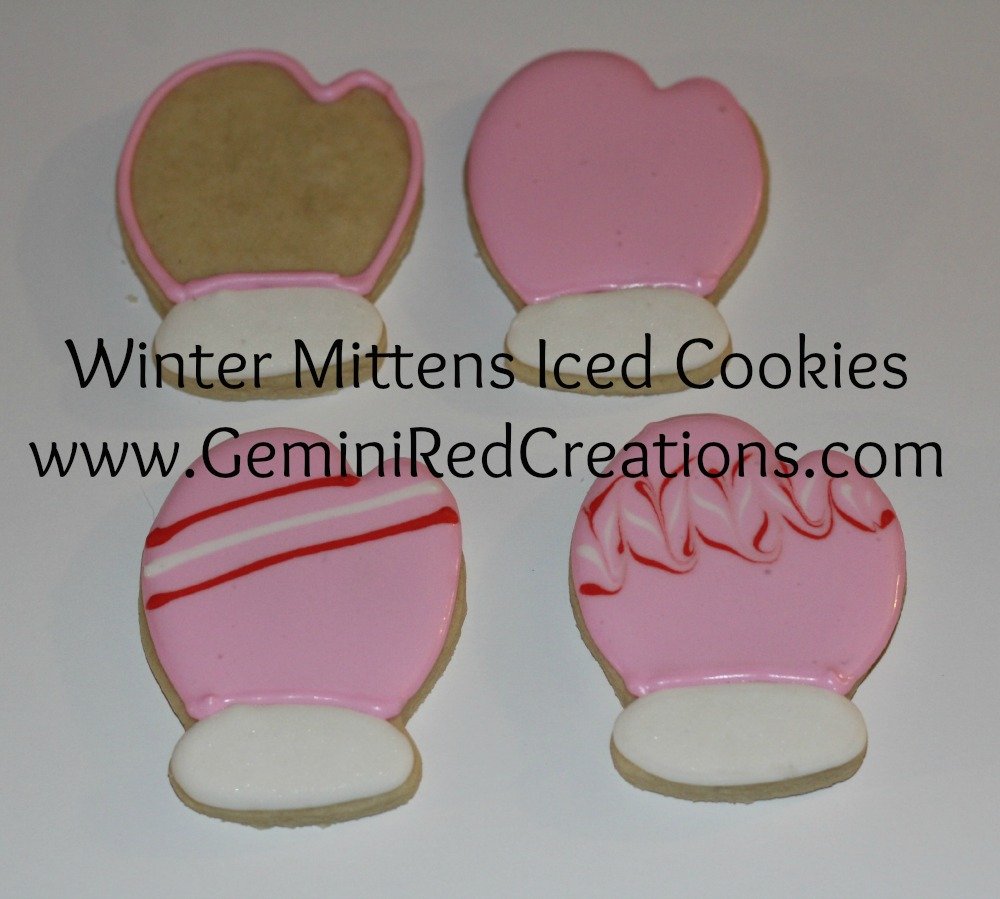
- Following the outline off of the picture of the cookies provided.
- Outline the bottom part of the mitten of each of the cookies in pink. After allowing the outlining to dry for 30 seconds before filling in the cookies in with the pink thinner icing. * Allow the filling also to dry for about 30 seconds
- Outline the top of each of the cookies in white. Allow the outlining to dry for 30 seconds before filling in each in with the white thinner icing.
- Allow several minutes for the mittens to dry before adding the markings.
- Draw a white line on lower half of the mitten.
- Draw a red line above and below the white line on the mitten.
- Using a toothpick pull through the lines to make a squiggle.
- Allow the cookies to completely dry for 5-10 hours.
It’s cookie time! Will you be making any of the cookies I’ve shared?
![]()