It’s time for Easter! This year instead of using that messy water and egg die that ends up all over the place – try some Twine Easter Eggs with this great DIY project from Heather L at The Healing Homemaker.
So, let’s just come out and say it – I love baker’s twine. Love it with a passion. I remember the first time I saw it and thought what in the word would I use that for. In asking a friend about it she listed all the fun ways she used it and I thought, sure it’s cute I could buy a roll or two…..so then fast forward to a year and half later and that roll or two is now 20 different colors with some back-up rolls “just in case” I happen to run out of a favorite color. My favorite place to get it is from Pick Your Plum. They are a daily deal site so you have to keep an eye out for when it pops up but it’s the best price you’ll ever find!
So on to our project. I saw this idea on Pinterest a year or more back and thought I would love to make these. Then life got busy and they got pushed to the back burner. One day while sitting in my backyard on a most gloriously sunny day, with 1 child napping and 3 playing peacefully, I thought, this is my moment! I am going to make a craft and enjoy the beautiful serenity of it all. So here you go.
This is what you will need to make these:
-Twine in multiple colors
-Plastic Easter Eggs (I tried to match the egg to the twine color in case any showed through)
-Mod Podge (I think any kind would work. I happened to have Matte so that’s what I used.)
-Brush for the modge podge
-Glue gun & glue
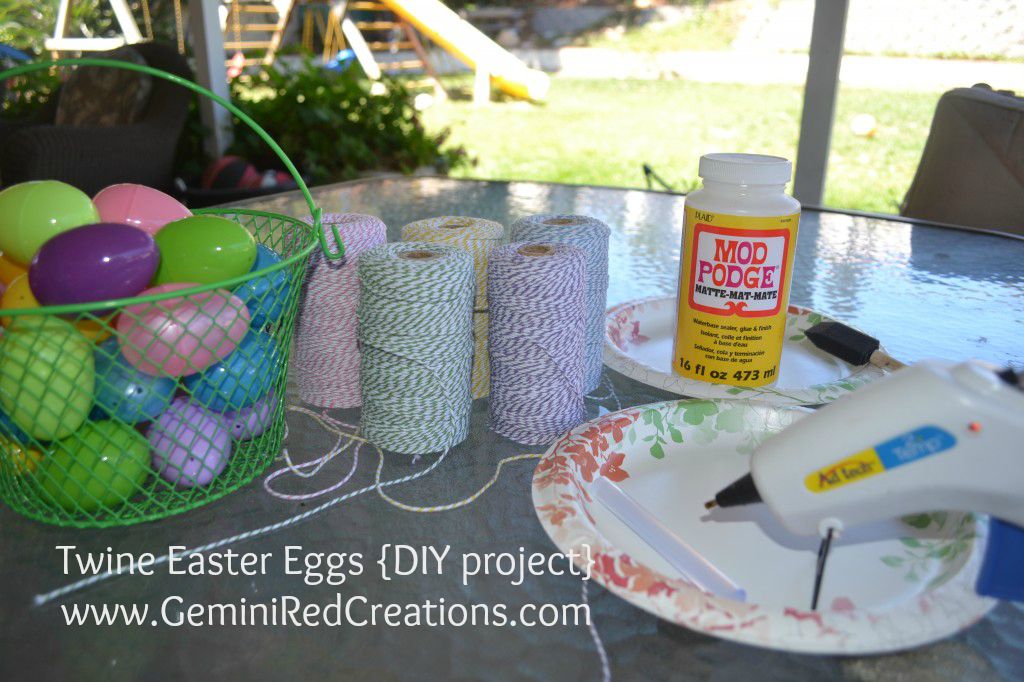
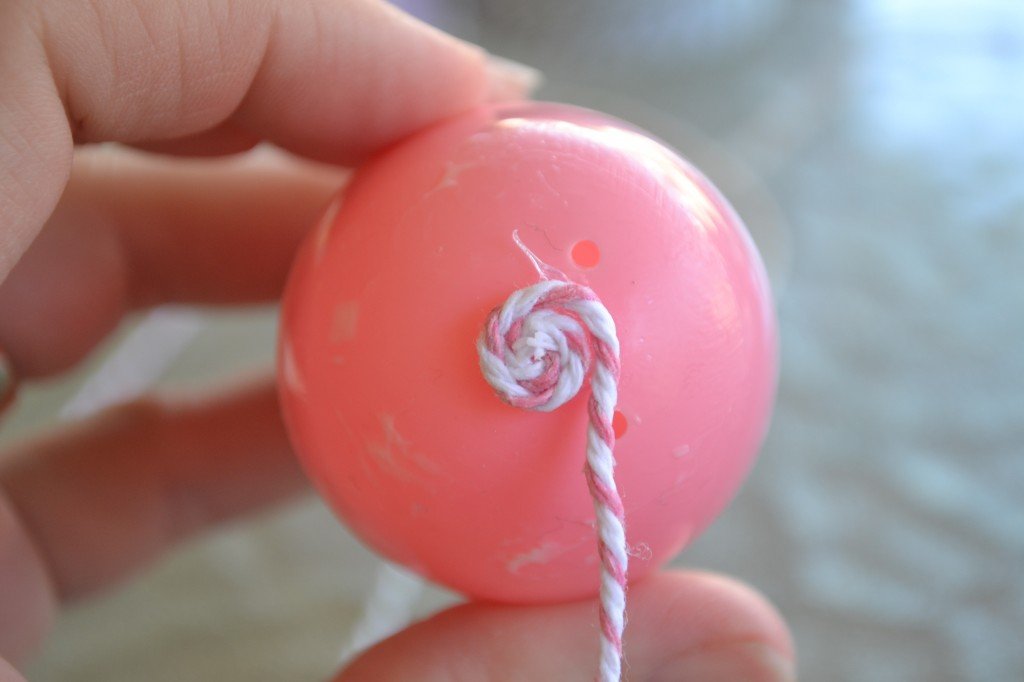
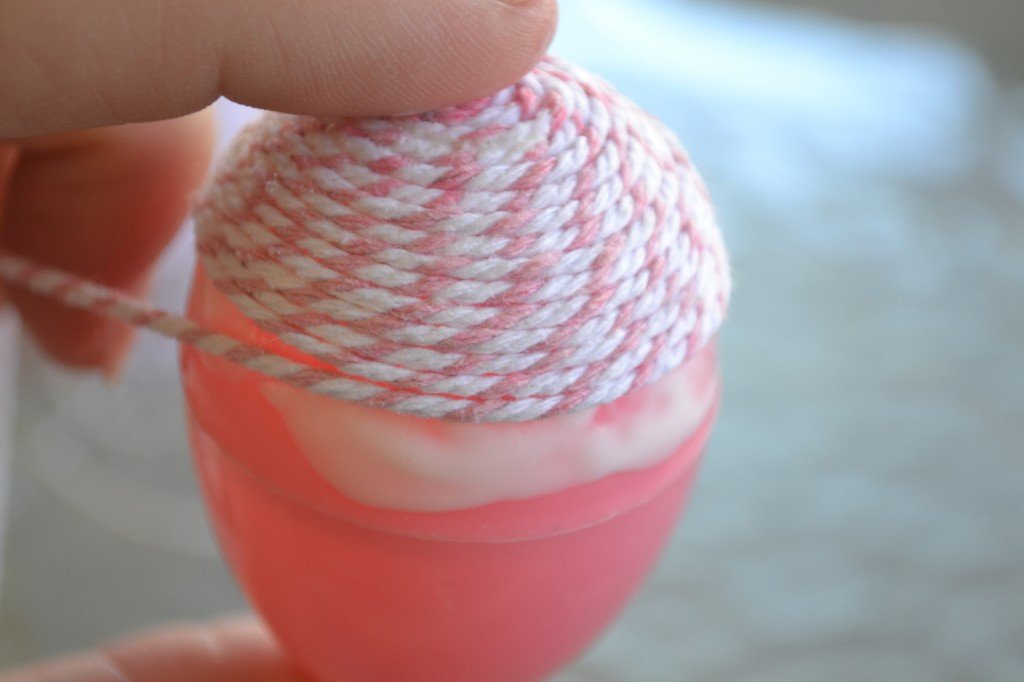
Nothing like a short supply list. Right? Okay, so the trickiest part for me was starting the eggs. What worked best was to dip about two inches of the twine into the mod podge, push off any extra and let it sit for a few minutes so it would get sticky. Then it was easy to make a small swirl and have the twine stick to itself as it swirled. Once I had a small swirl, I would then hot glue it to the top of the egg. I had previously tried to just glue the end to the egg and start swirling, but it just wouldn’t hold. It was too hard to glue gun it as I went and the mod podge wasn’t strong enough. So this way by starting with a glued down swirl you have a good permanent start. And the dipping the twine in mod podge just helps to keep the swirl together before you glue it, otherwise you end up glue gunning your fingers which kind of hurts a lot. *Another little tip – you might want to glue the two egg halves together because if your littles decide to try and break them apart they are hard to get back together with the twine on them.
So now we have a swirl going, take the brush and brush some modge podge around the egg where you are going to continue to swirl your twine. Then swirl a little twine, add a little modge podge and continue doing that back and forth until you hit about halfway down the egg.
At the halfway point, which for me was always where the egg sides connected together, you will need to flip it over and start again from the other side. It’s easy to wrap it going thin to fat, but almost impossible going the other way. The twine just slips all over and you will quickly become frustrated. So cut off the end you finished and then start the procedure all over on the flip side.
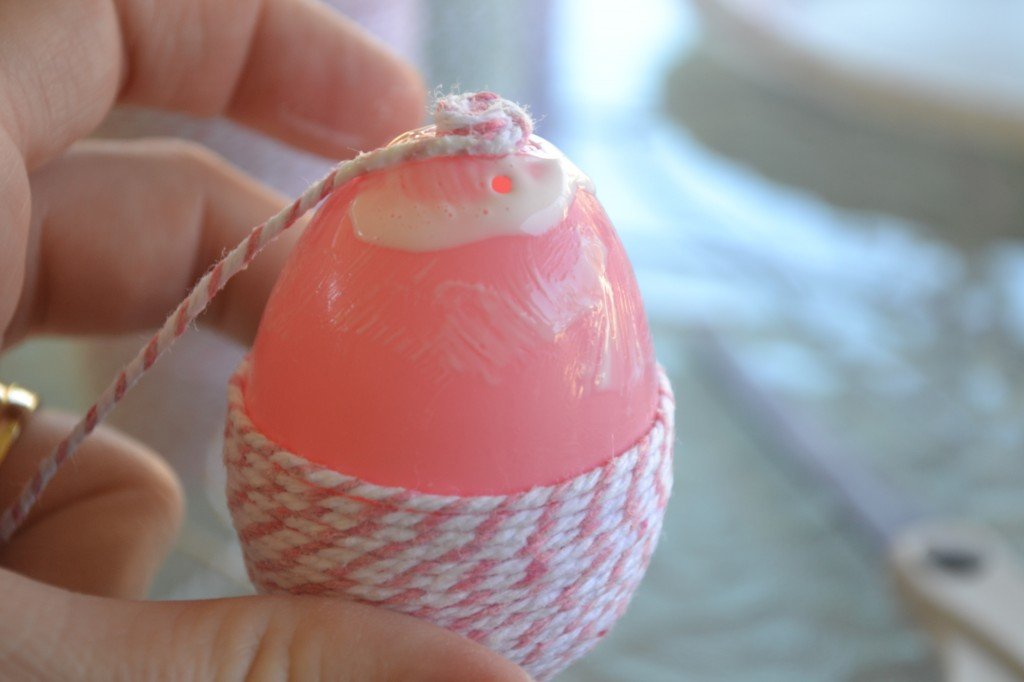
Once you get to where they meet, just clip your end to line up with your other end and add a little extra modge podge in there. Once it dries you won’t even be able to tell it’s there.
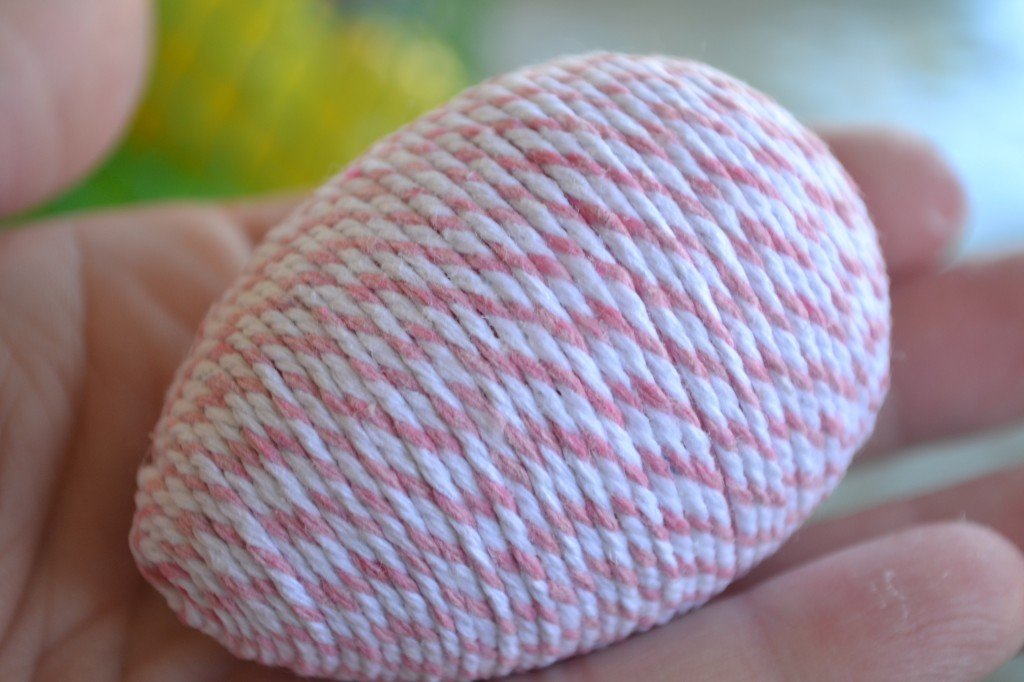
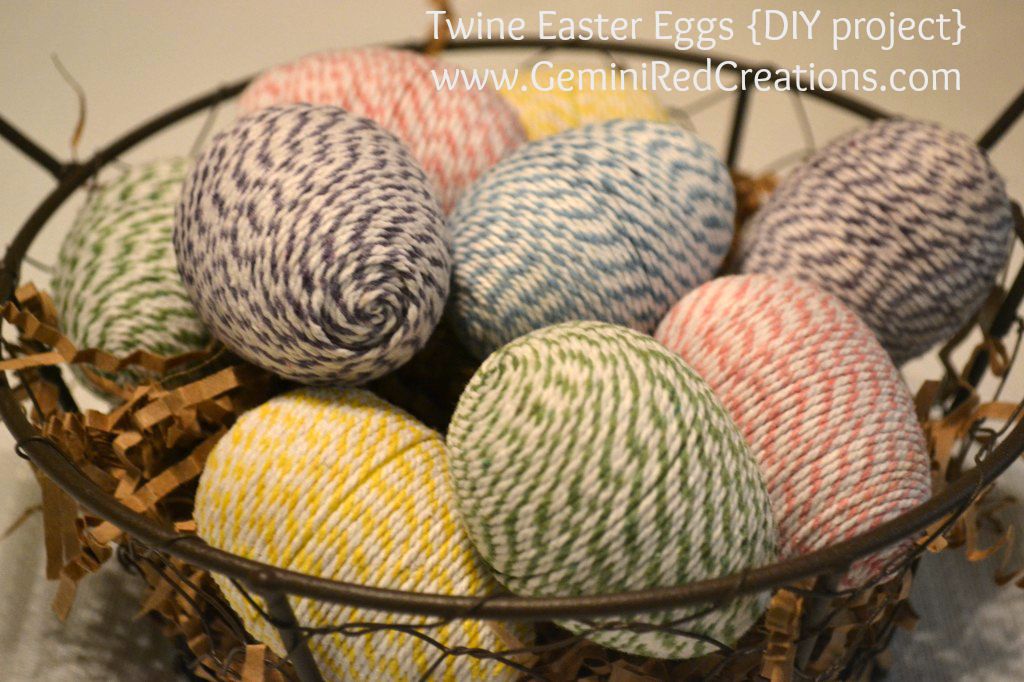
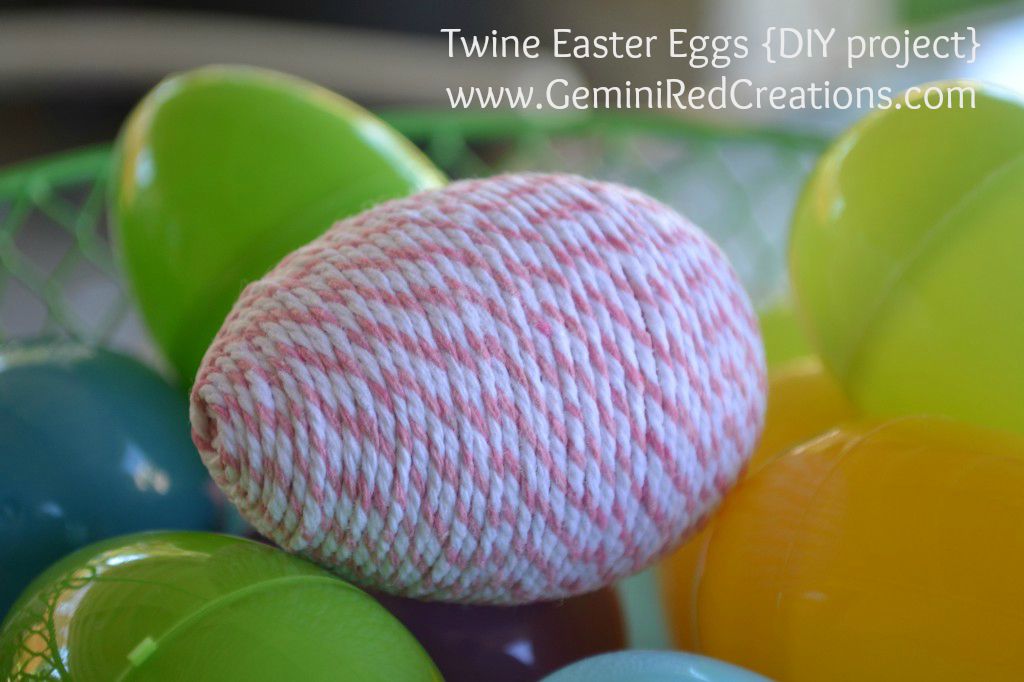
Set it somewhere to dry and you are done! Well, done with that one;) What fun is an Easter basket with just one egg right? I decided to do two of each of my softer colors of twine. Then find a cute basket and some Easter grass and you are set for a great Easter decoration.