I admit it, I purchased a Nikon DSLR camera approximately 2 years ago and sadly still don’t really know how to use it properly. It’s one hell of an expensive point and shoot camera! So, lucky for me I have some good friends who are photographers and really good at it. Today I’m sharing the wealth of information my friend Kim P from Lewis Creek Photography has and it willing to share. I have had the privilege of having her do several photo shoots for me to showcase my products. Below is post from Kim!
 Greetings! When I first started my photographic journey, I barely knew how to use all of programmed settings on my point-and-shoot camera. But still, I knew I was quickly developing a passion for this medium and decided to research purchasing my first DSLR. And I did. And I still did not know much beyond the automatic settings. There is nothing wrong with using the programmed settings as advancements in technology mean you will probably get some very nice images by allowing the camera’s programming to select the settings for you. But if you want complete creative control, learning how to photograph in manual mode will allow that to happen. I read article after article that advised this same thing so I set out to learn as much as I could about photography and the functions of my camera. And learn I did. There are so many wonderful resources available on the internet and I will share a few of those along the way.
Today, I will focus (pardon the pun) one of the basic functions: aperture.
The best way to describe aperture is to say it is the opening through which light passes from the lens to your camera sensor. Adjusting the aperture, or controlling the size of the opening and amount of light, has a huge impact on the image you capture. You can take advantage of this by knowing just how it will affect your image. Aperture is measured in f-stops. The only confusing part is that the smaller f-stop numbers actually mean a larger opening and the bigger f-stop numbers mean a small opening. An f-stop of 2.8 is a big opening and an f-stop of 18 is a much smaller opening. Here is an illustration:
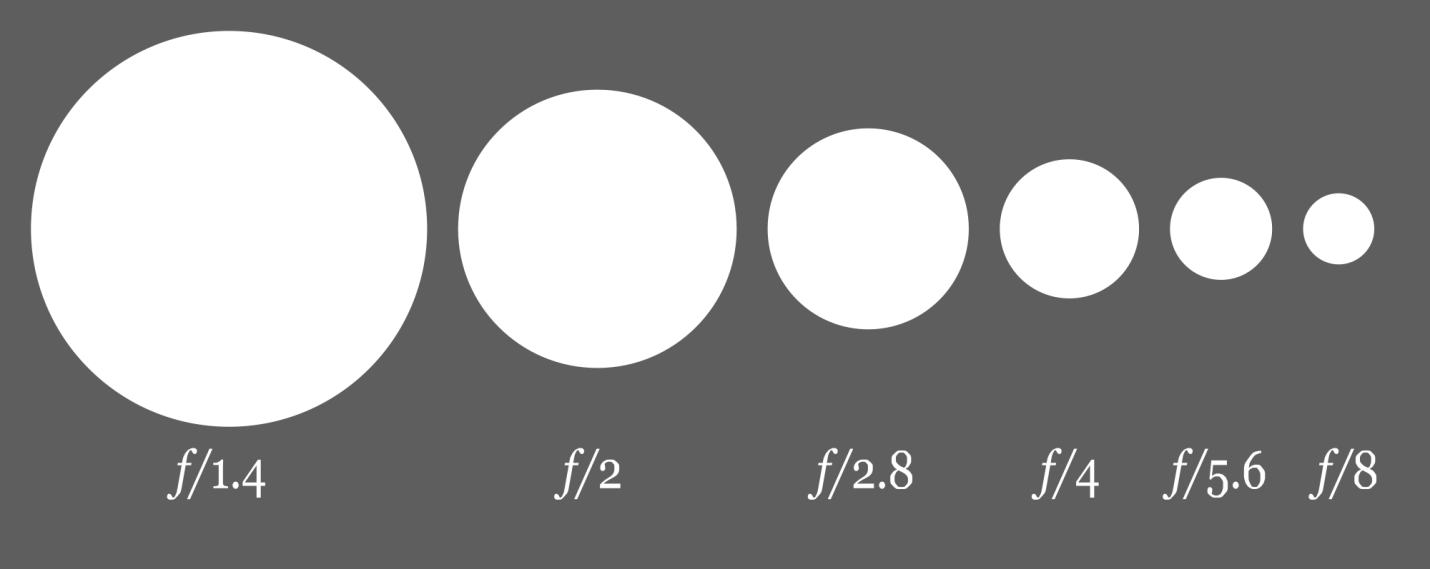
Source: Wikipedia.com
So what does this means for how your images will look? Let’s break it down with some examples. The wider f-stops (smaller numbers) have a shorter, or shallow, depth of field. That means that the area of focus will be really narrow in depth from the camera to the background. This is when you want to emphasize a particular detail and want the rest of the background blurred out. The narrower f-stops (larger numbers) increase the depth of field so that more of what you see in the viewfinder is in focus from the camera to the background. This is particularly important for landscapes or group portraits with many people and you want as much in focus as possible.
Here are some example photos where a larger aperture was used:

In the photo above, the frosty leaf detail is in sharper focus and the background is completely blurred out. The background was a distance away so I used f/5 for this photo. Here is another example:
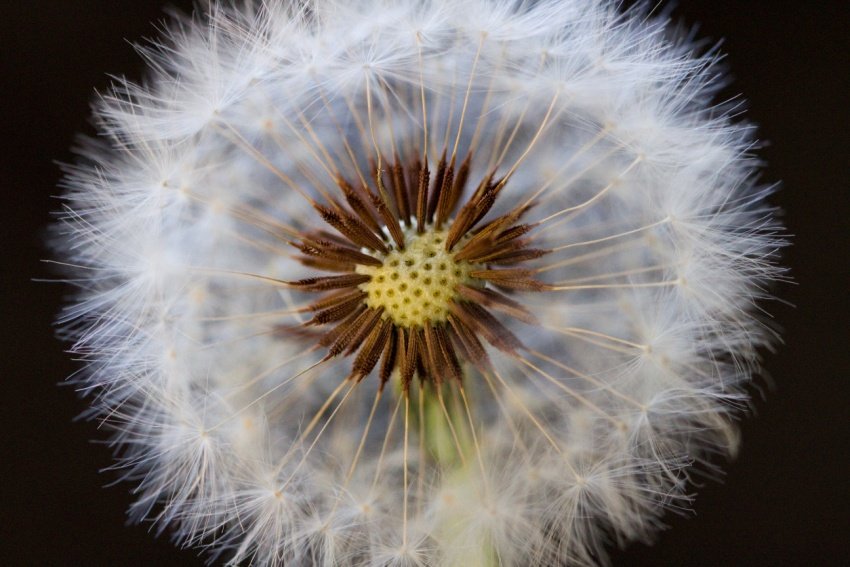
This dandelion was shot at f/3.5 and you can see how center is the point of focus and the parts that are closer to and further from the camera are softer focus.
Now let’s look at a couple of examples of narrow apertures that give us a deeper depth of field.
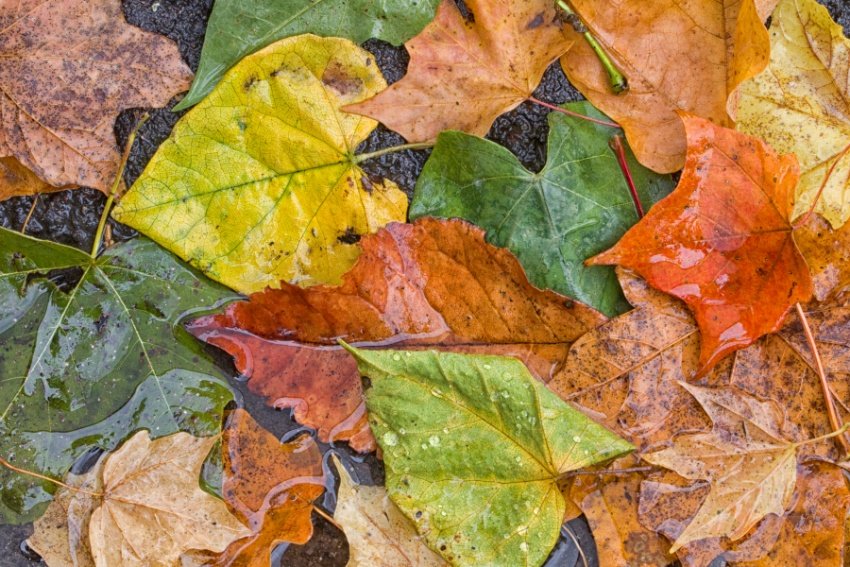
In the photo of the fall leaves above, I wanted to have as much of the detail in sharp focus as possible so I used f/18.
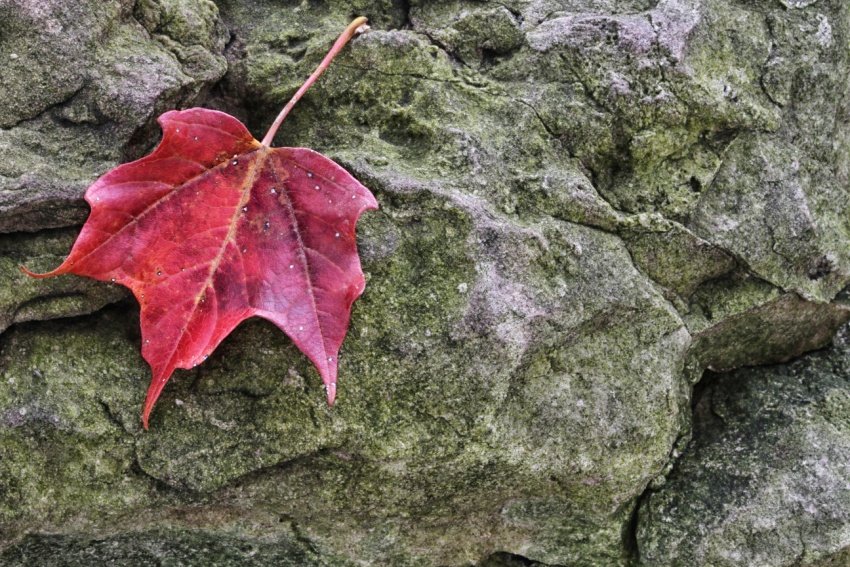
For the leaf photo above, I wanted to keep the detail of the rock so I chose f/22.
Because most of work is nature, I will always set my aperture, or f-stop, first to achieve the look I want and then make other adjustments as necessary.
Want to learn more about aperture? One of my favorite resources is Digital Photography School where you can find an article on aperture.
![]()