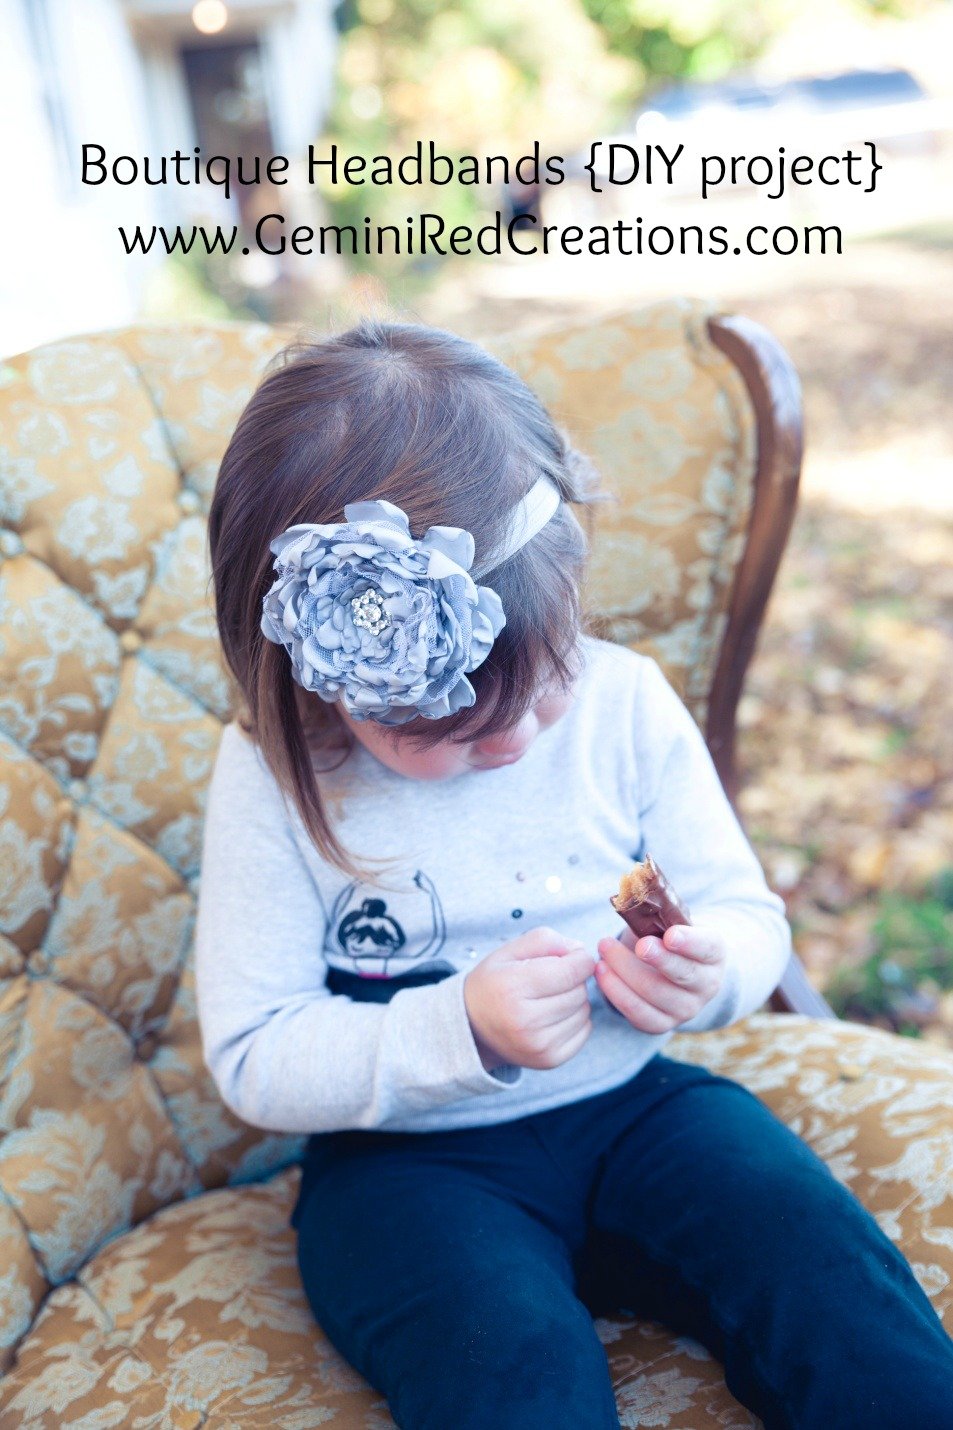
This is probably a favorite tutorial of mine, shared by my wonderful friend Kim H who is also a photographer (like my other friend Kim P). I’m lucky to have had Kim do a photo shoot for me to showcase some lockets I had available in my shop. Kim does her photography under the name of Steel & Sugar Photography. You are going to want to make these for yourself or your beautiful girl(s).

Hello y’all! Today I’m going to let you in on a secret. Ready. You can make your own boutique flower headbands. It’s true! I’m going to show you how and give you the template you need to get started.
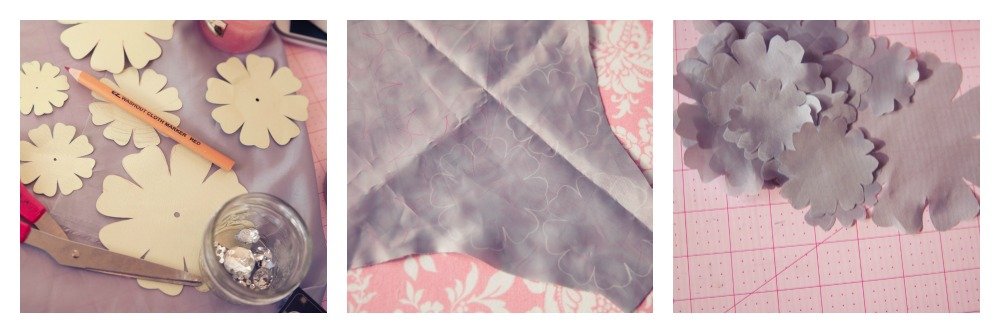
Let’s bust out the craft supplies:
Synthetic Fabric Remnants
{Lining fabric works well and is what I used here. I also used some tulle. Organza works well too.}
Template (link below)
Fabric Pencil {Chalk will work too.}
Scissors
Candle and Ligher
Fold Over Elastic
Needle and Thread {Or glue of your choice}
Small felt piece {optional}
Flower Center {This can be a button or anything you can sew or glue down.}
Pliers {optional}
After you’ve decided on a color and gathered your supplies, start by tracing all your flowers. You’ll need to trace 2 of each flower. When you’re done tracing, cut each flower out.
Then you’ll have a nice pile of pretty petals. Now we’re going to singe the edges.
Fire.
{DO NOT LET ANY CHILD ATTEMPT THIS PART OF THE CRAFT. KEEP THE FLAME AWAY FROM ANYTHING FLAMABLE. IT MAY BE A GOOD IDEA TO PLACE A BOWL OF WATER NEXT TO YOU IN CASE A PIECE OF FABRIC CATCHES FIRE. BE SAFE.}
Alright, here we go. You can light any kind of candle you are comfortable with. I think they need to be small-ish though. Very, very carefully ease the petals of each flower close to the flame. You can always use a pair of pliers on the smaller ones to keep your fingers back from the flame a bit. Don’t stick the petal in the flame! You are only trying to get the edges to melt and curl up a bit. It will take trial and error. So, you may want to practice a bit on a scrap piece of fabric first. I usually start with the biggest flower and work my way down to the smallest.
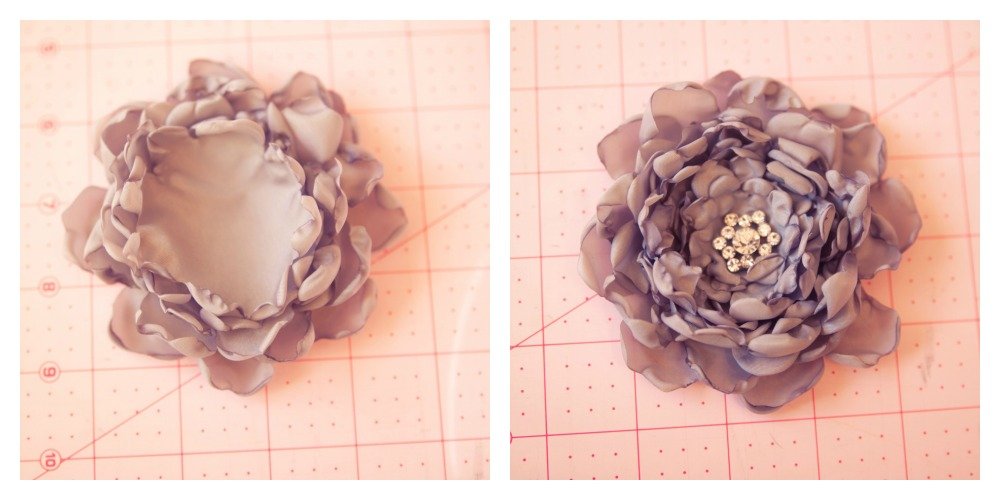
As you finish curling the edges, start to stack the layers. Offseting each layer.
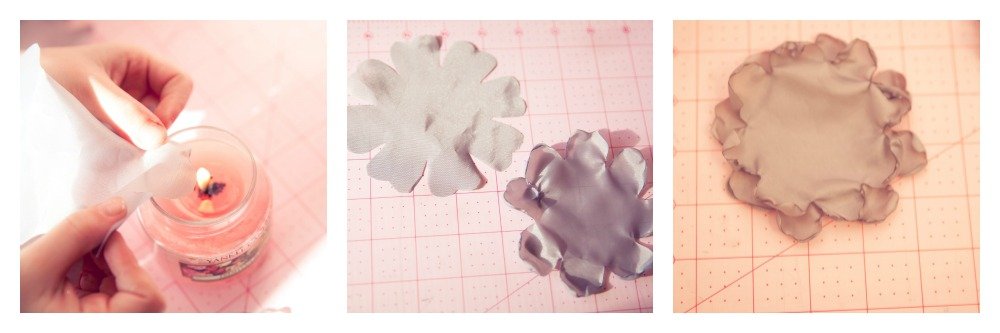
Continue stacking as you go.
After I got all my layers stacked and arranged I decided I wanted my flower a little fuller. So here’s where the tulle comes in. I just laid out some scrap tulle and cut some comparable size circles to sneak in between the layers. I used the same technique to melt and curl the edges of those circles too. Be super careful. Tulle melts a lot faster than the fabric. I just used some random things to make my circles.
After you’ve melted and curled the edges of your tulle pieces, gently sneak them in between the layers of your other petals.
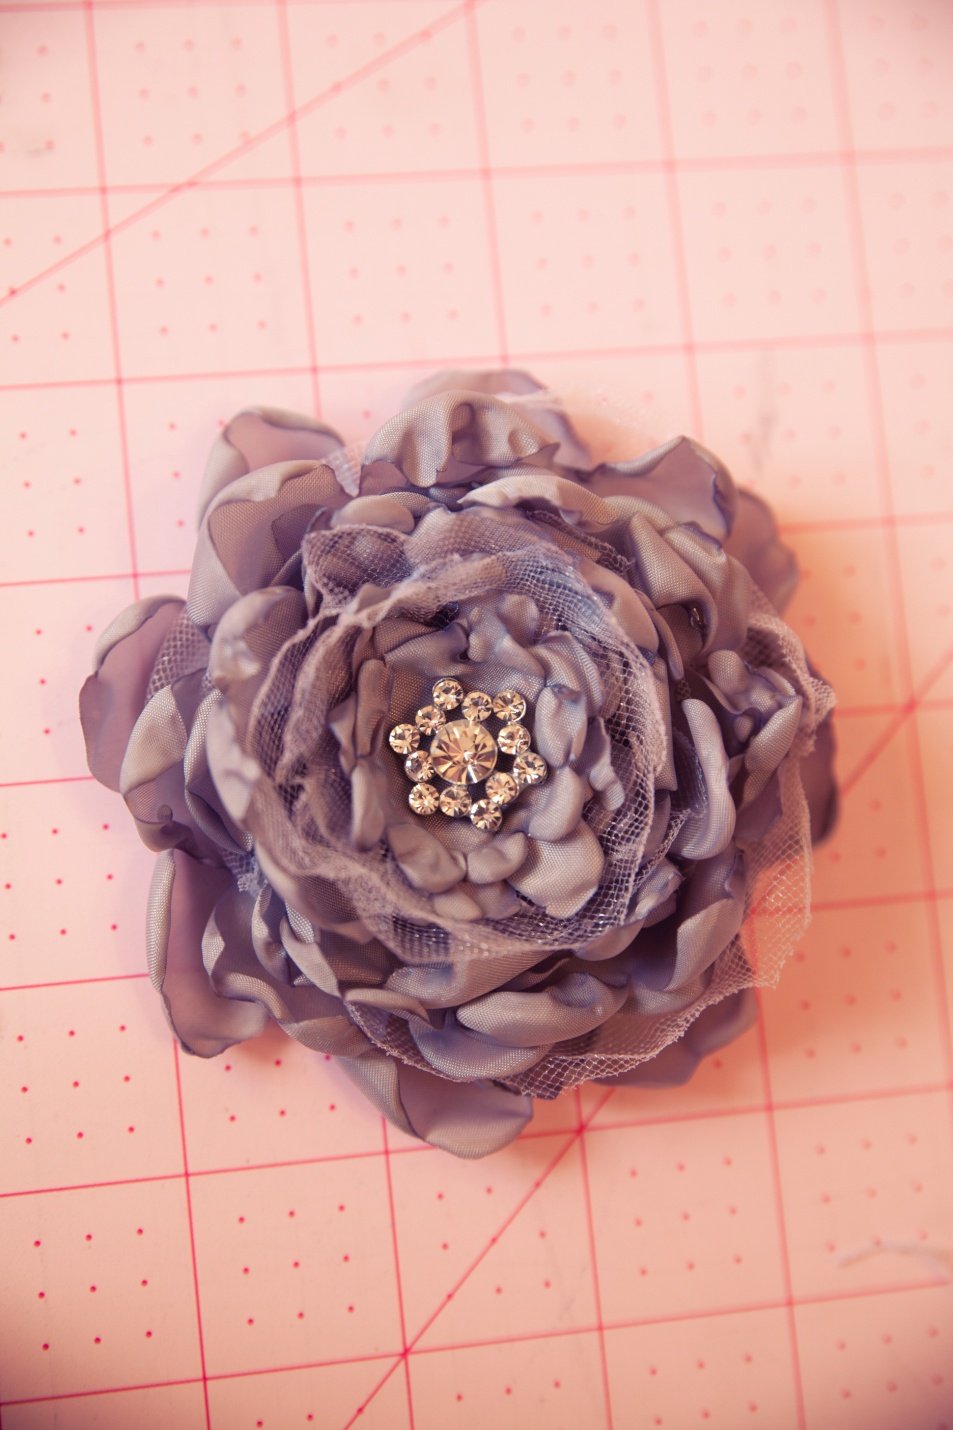
It adds a tiny bit of sparkle to it too. And who doesn’t like sparkle!
Now we need to attach all these petals together.
There are two options here. I usually take the hard one and stitch all these layers together. You can totally just glue them together with hot glue or your favorite fabric glue. I would test the glue on a scrap piece first though.
I’ll show you how I sewed them together.
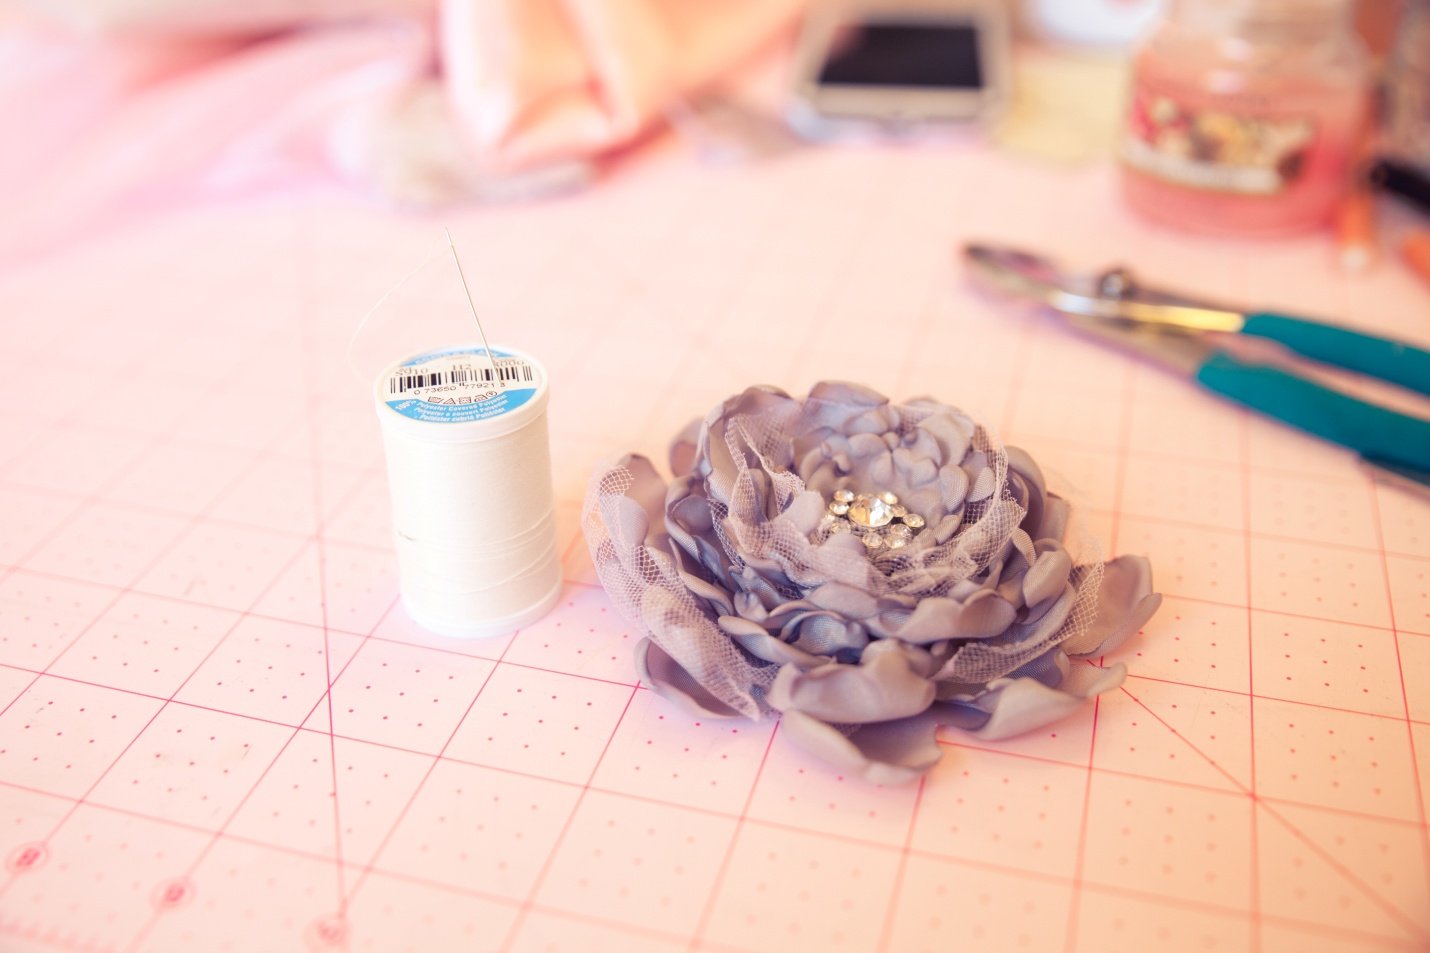
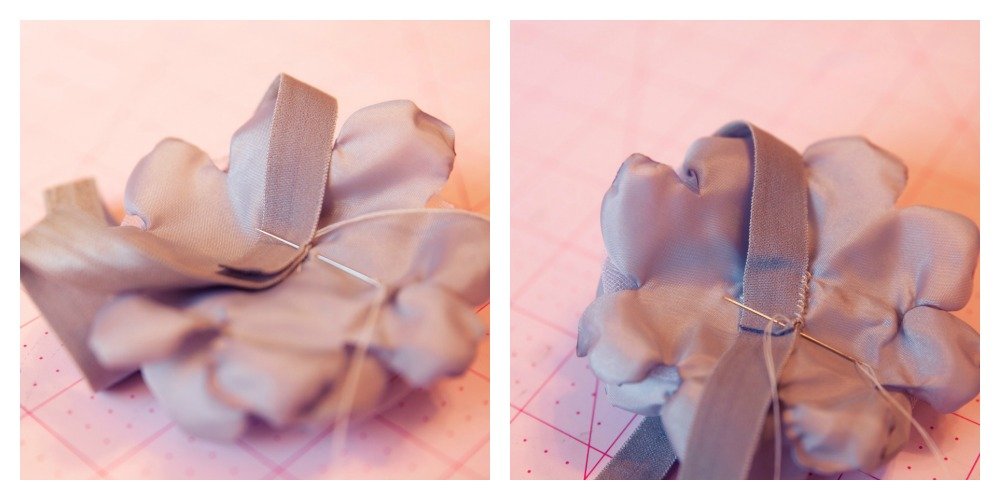
Thread your needle and tie a knot at the end. Get all your layers just the way you want them. I placed my button on top and pushed my needle up from the bottom into the spaces in the button. If you use a button with a shank you do the same thing except you only have one hole to push your needle through. Then push the needle back down catching the button in the loop.
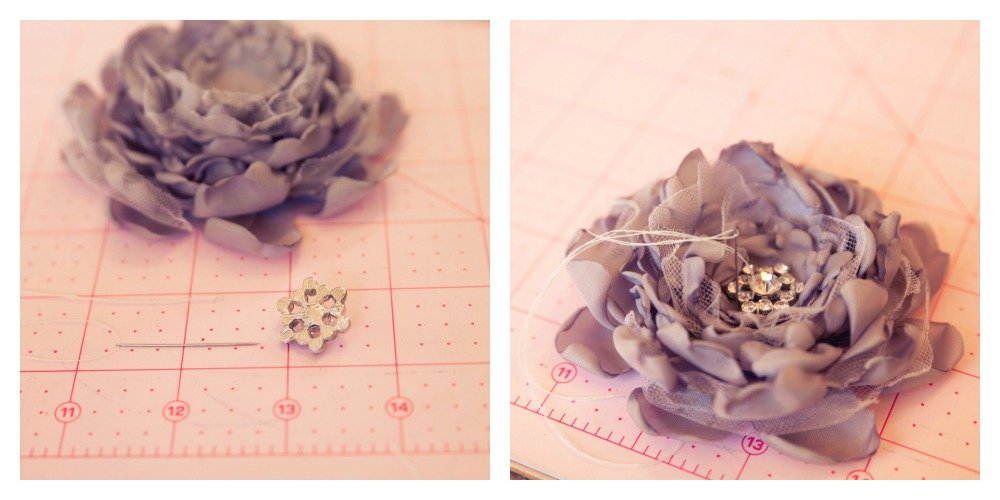
I continued all the way around this button.
{Of course if you choose to glue then you don’t have to worry about it.}
Once you have your flower petals attached together you have so many different things you can do with your flower. You can put it on a clip for a barrette. You can attach it to a sweater for a pretty embellishment. I’m going to attach it to FOE and make a headband.
“What is this FOE stuff?” you ask.
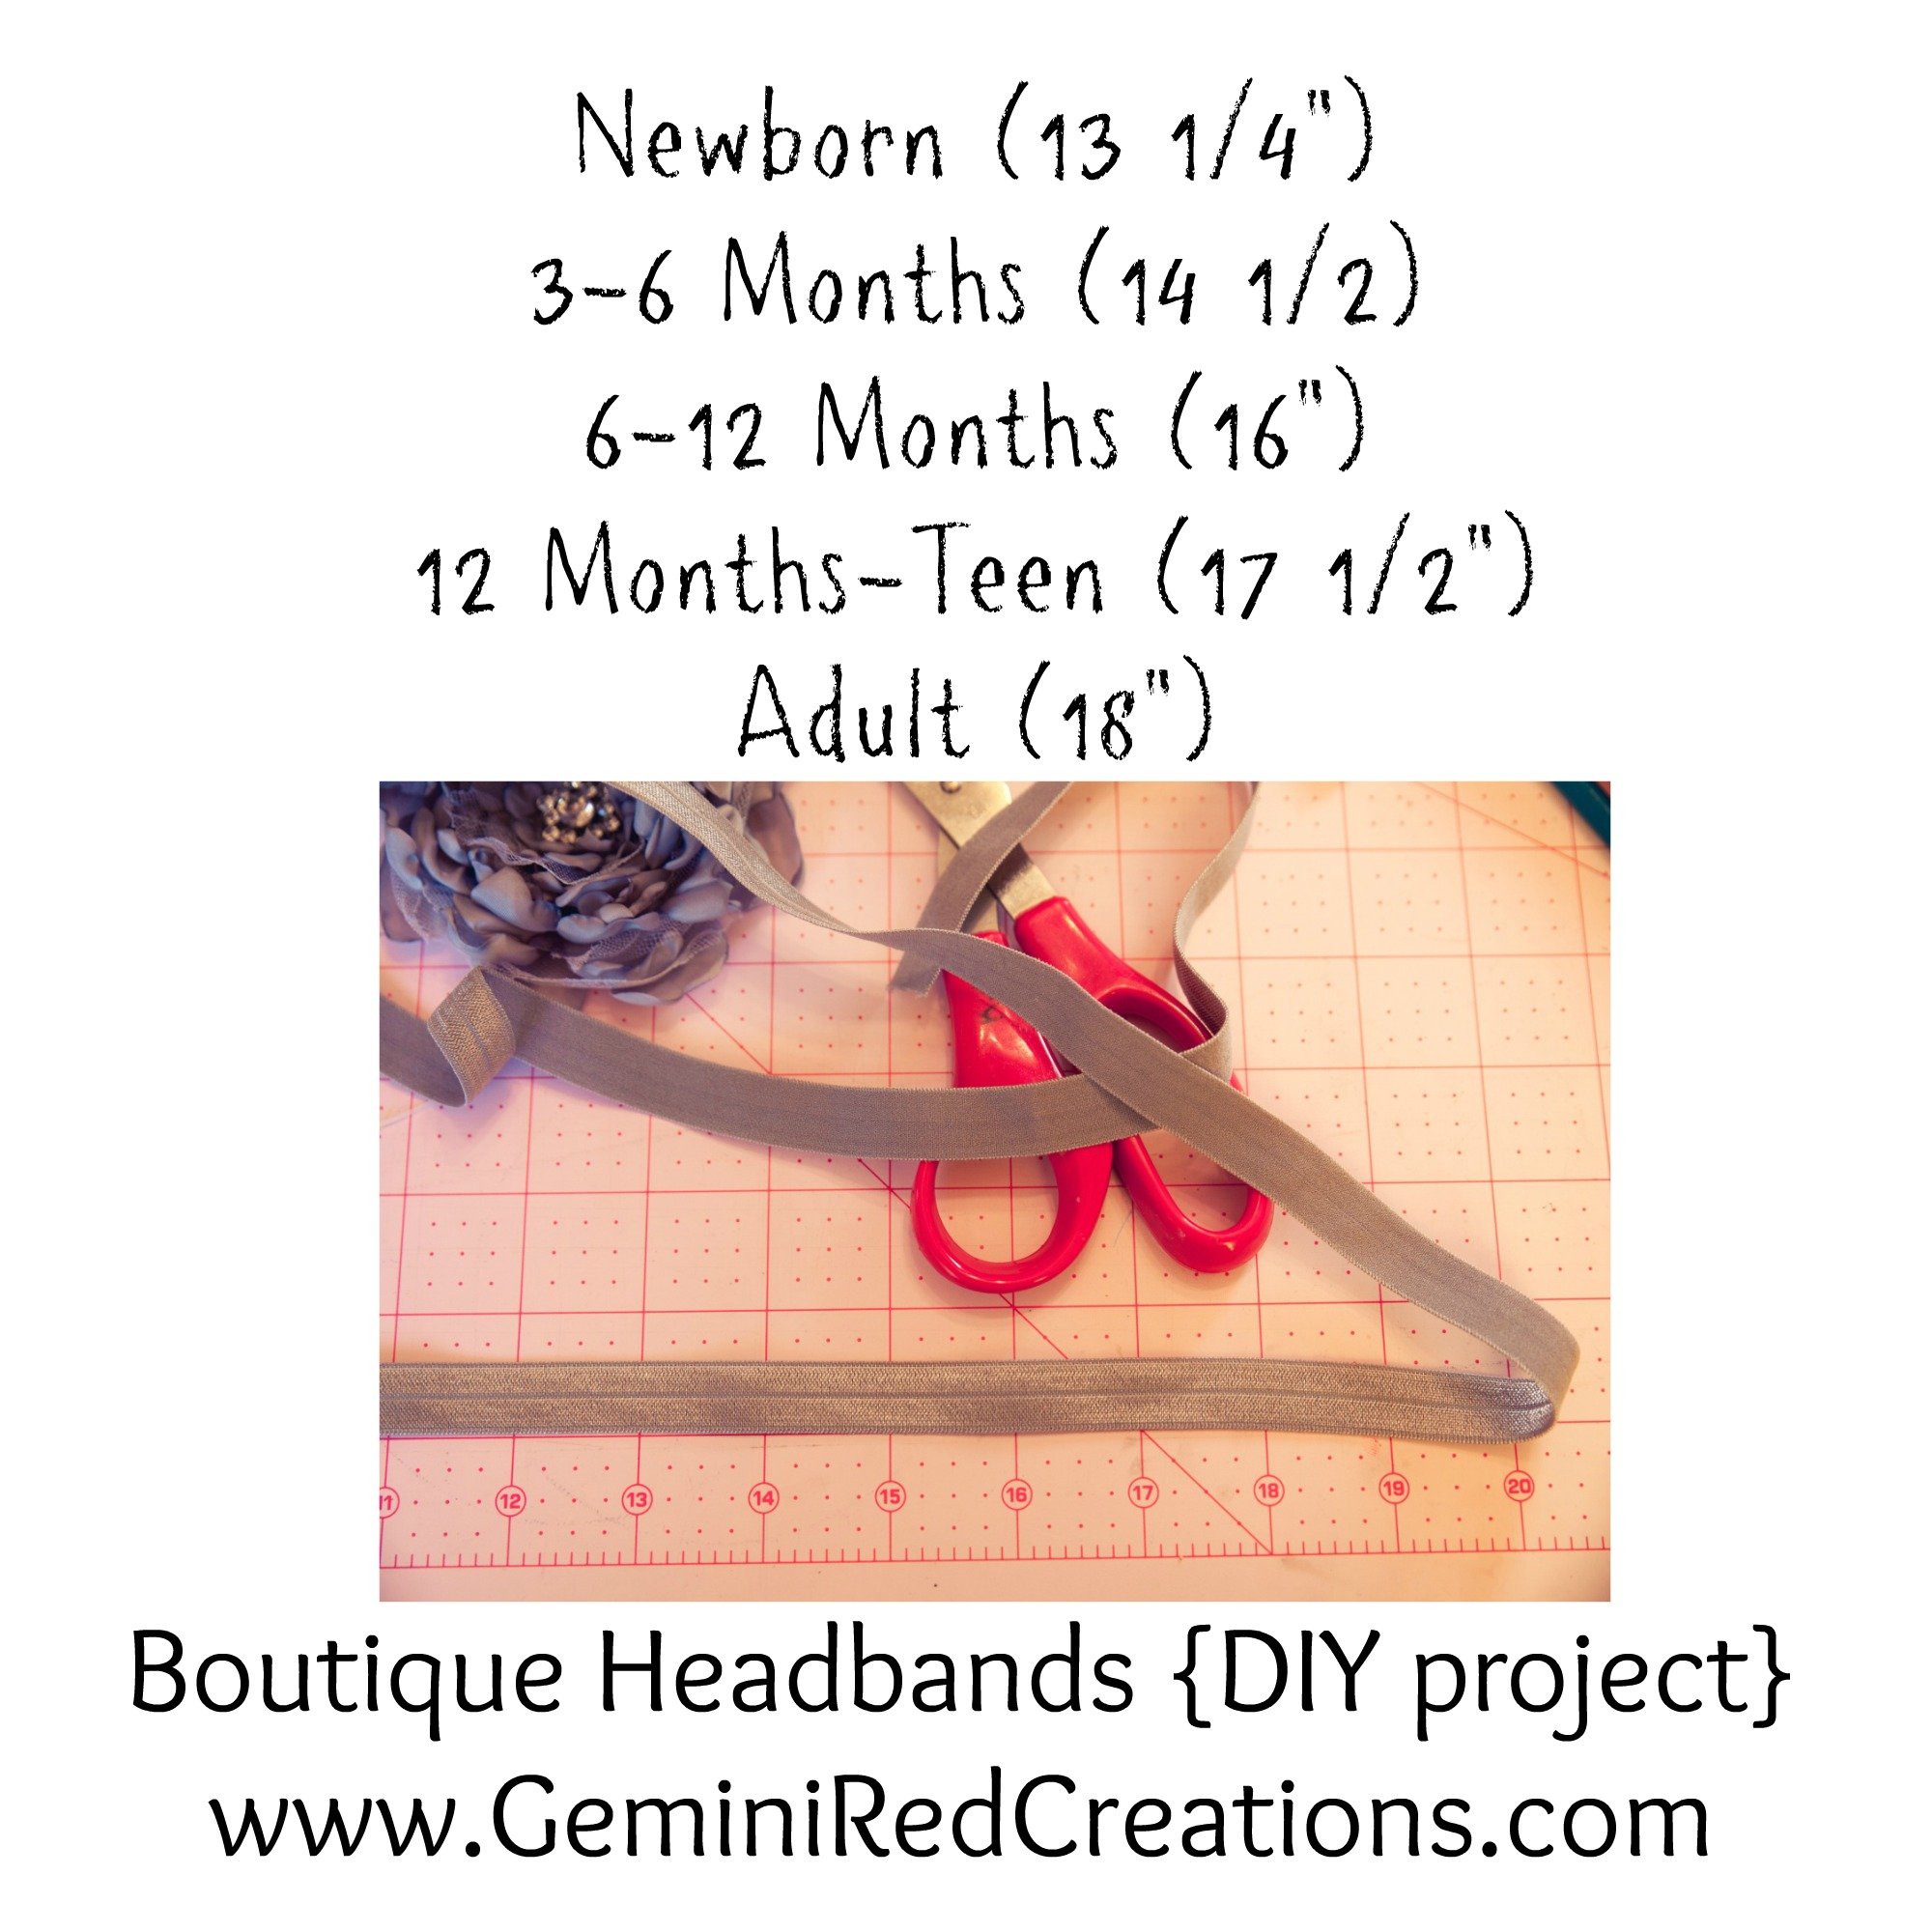
It is short for Fold Over Elastic. A wide elastic used to make headbands and very popular right now made into hair ties. I cut my elastic 17 1/2″ long to fit my kids.
Here’s a BoutiqueFlowerTemplate for the petals and a chart below for sizing your elastic:
Then I took my cut piece of elastic and heat sealed the ends using the candle from the petals. Next I took and made a loop. Overlapping the ends by about 1/2 an inch.

I laid the elastic on the back of the flower. Using my needle and thread that I had left from stitching the flower together I stitched the elastic to the flower.
{Here you gals using glue will have it easy. I do suggest if you use glue to cut a small circle of coordinating felt and use it to cover up the elastic seam and the glue.}
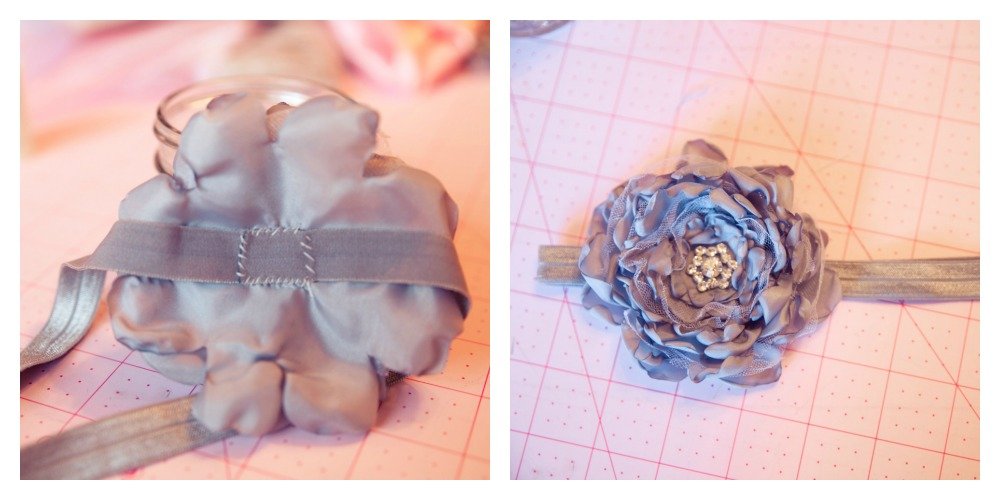
And there you have it! A beautiful boutique headband made by you.
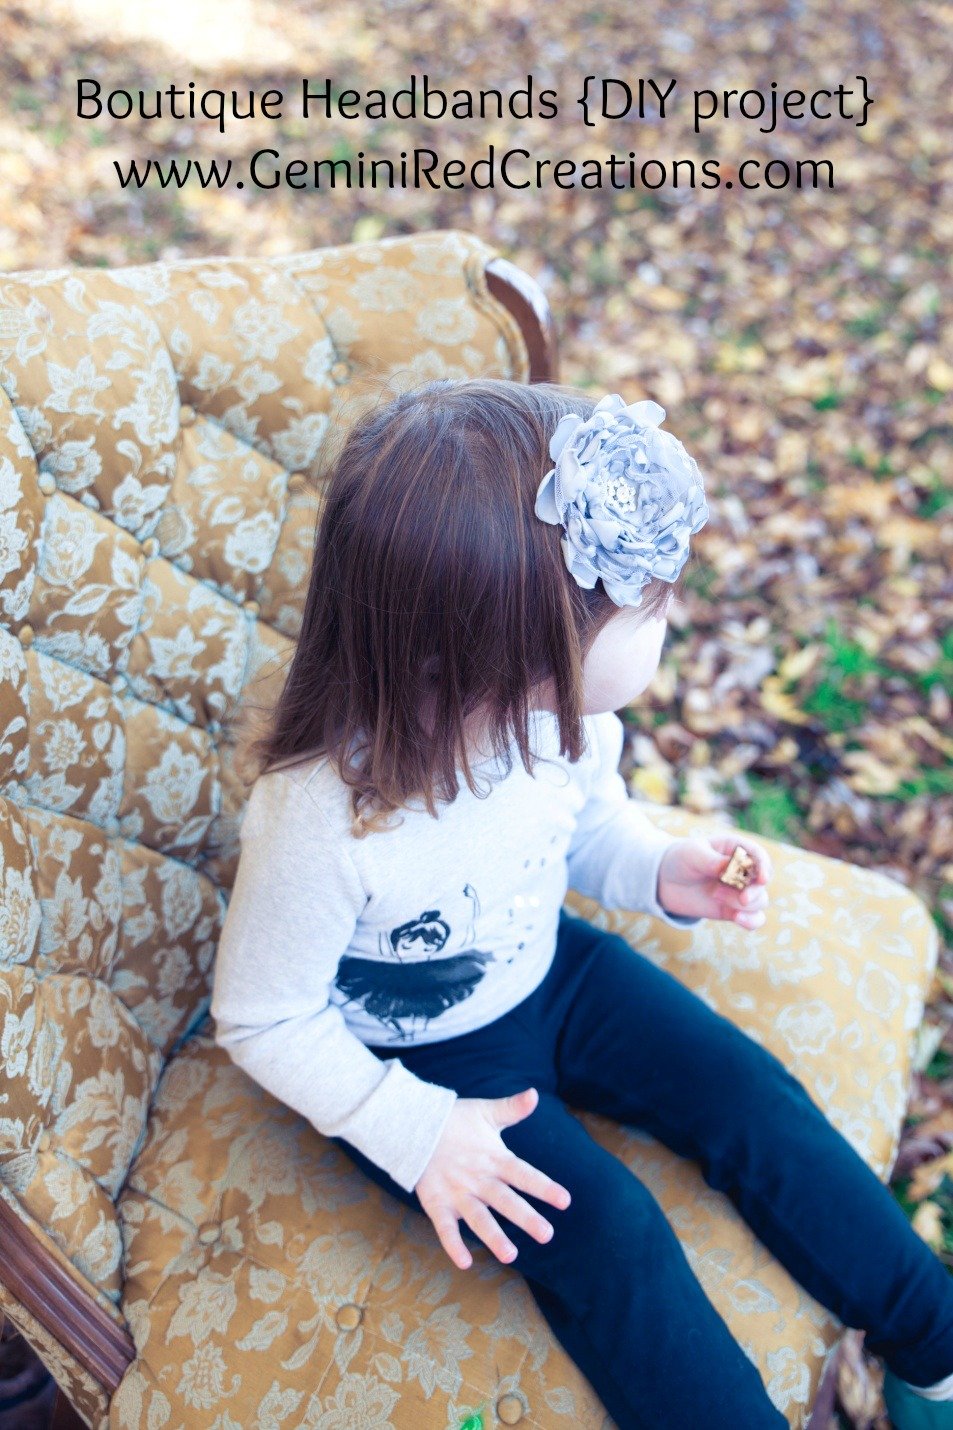

Are you going to try this for your cute little ones, for yourself, or a gift?
![]()