
Today, Deanne from 2RusticPlace is going to share a fun and easy tutorial with you all! Get a jump on the Halloween season, by getting your wreath ready early!
Can you believe it’s almost fall and Halloween already? Fall and Spring are my favorite seasons because the weather is so perfect – not too hot and not too cold. Deanne’s husband love Halloween so there are lots of scary props around their house – he does it all for our kids and their friends in the neighborhood and they love it. 🙂
Even though her husband loves all the scary stuff, Deanne would prefer something a little more on the cute side of Halloween decorations. And thankfully, because of that – she is sharing this super cute Halloween wreath tutorial.
Here is a tutorial for a fun Halloween wreath.
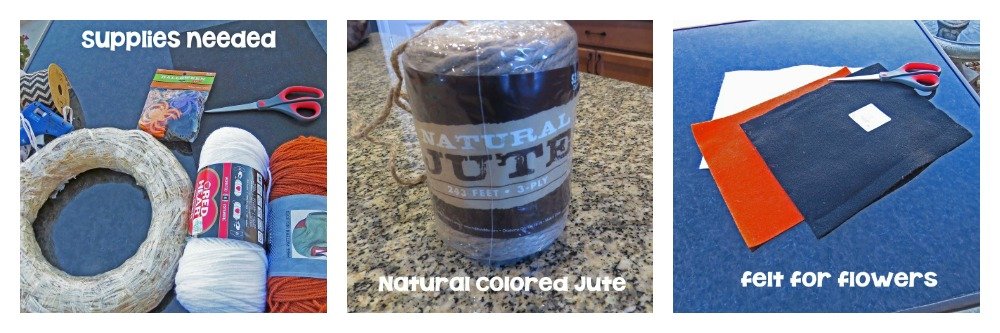
Supplies you will need:
Straw wreath (or Styrofoam wreath form)
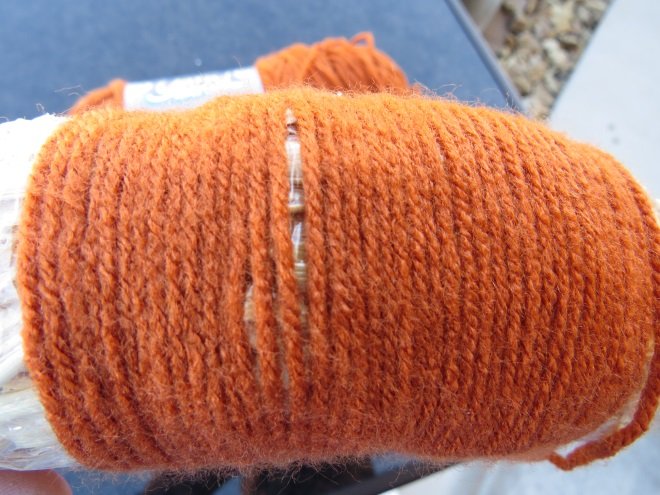
Orange yarn
White yarn
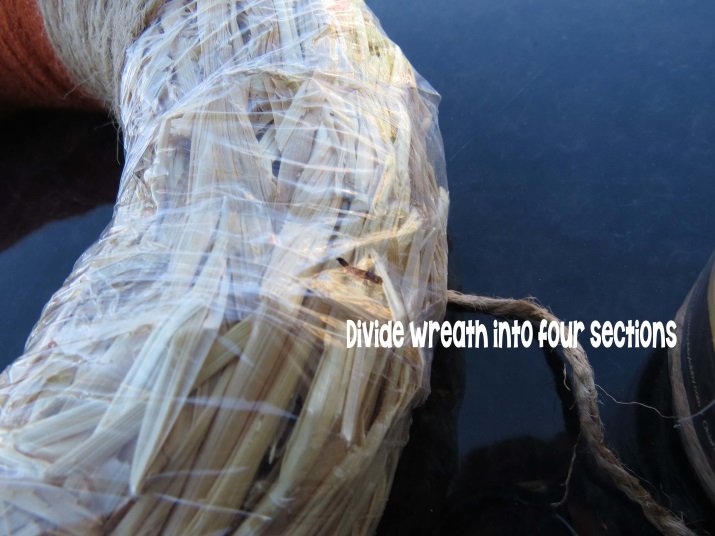
Roll of Natural Colored Jute
Black stiff felt for bat
White, Black, and Orange soft felt for flowers
Hot glue gun
Scissors
Optional- Halloween spiders found at the local craft store
You will want to take a ruler and divide your wreath into four sections using a sharpie. That way it will be easier to know when to start and stop. You can always try to eye ball it, but for those that are more exact, marking it before will help speed the process.
Hot glue beginning of yarn to the back of the wreath form and begin wrapping around the wreath.
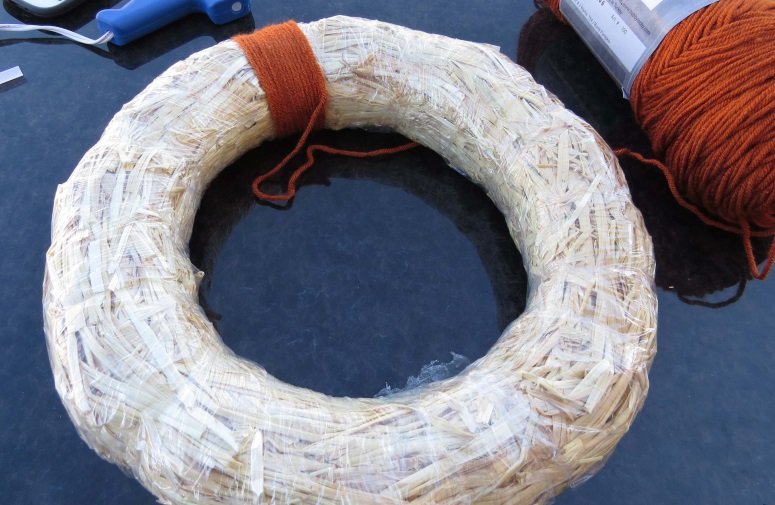
There will be some gapping in the yarn, but that’s okay you can go back and wrap more yarn around to cover the gaps.
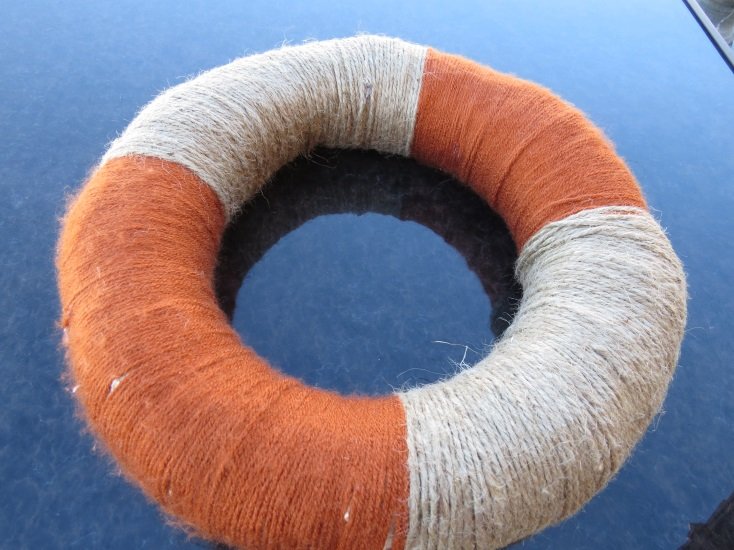
Once you have wrapped the yarn to your mark, hot glue a piece of jute to the back and begin wrapping to the next mark. Hot glue is your best friend so apply it where needed on the BACK of the wreath.
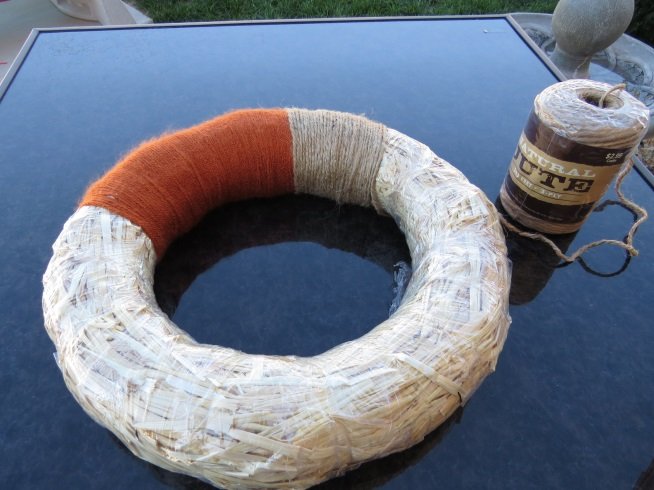
And so on until your entire wreath is covered.
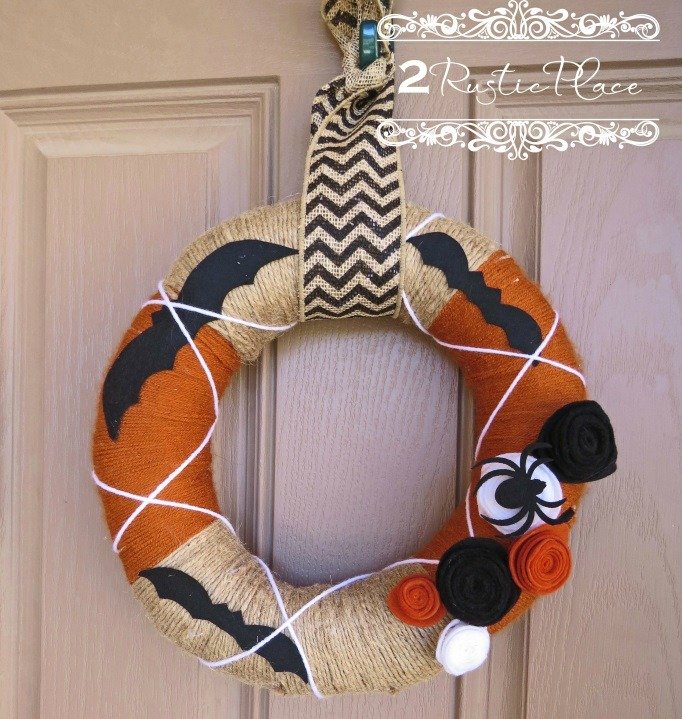
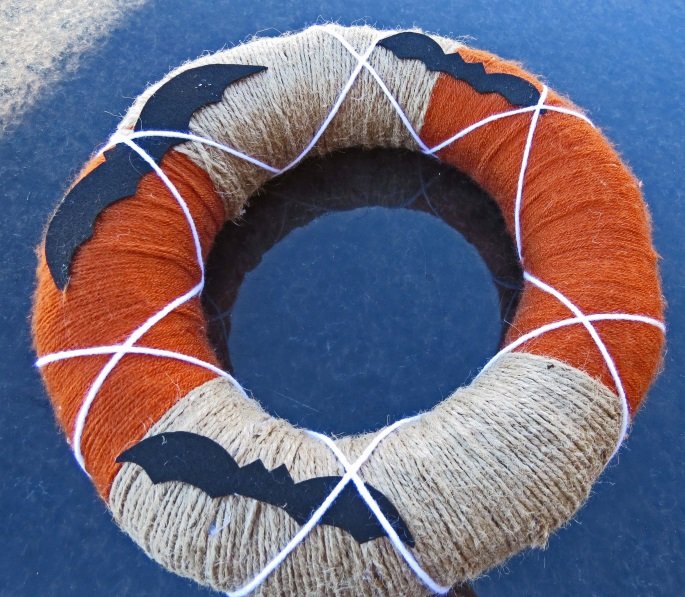
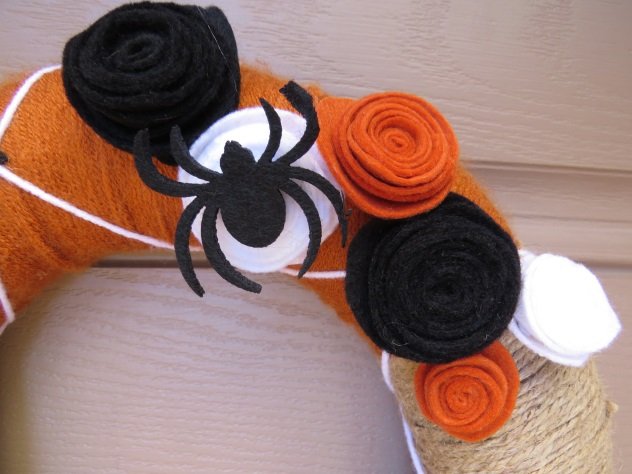
Next, you will want to cut the bats out of the stiff felt (found right next to the regular felt in the craft stores. In the tutorial we are making three bats, but that is up to you) You can free-hand draw them onto the felt (or find a picture on Google you can print out and trace), then cut it out and place it on the wreath to make sure it would fit the curves.

Glue the bats onto the wreath, leaving a big enough gap on one side to be able to fill in with felt flowers.
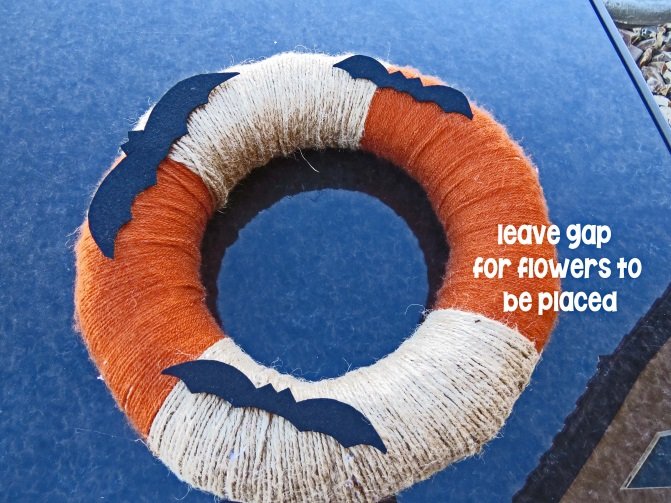
Take your white yarn and place it at an angle on the back of the wreath and secure with hot glue. Begin wrapping at an angle over the bats.
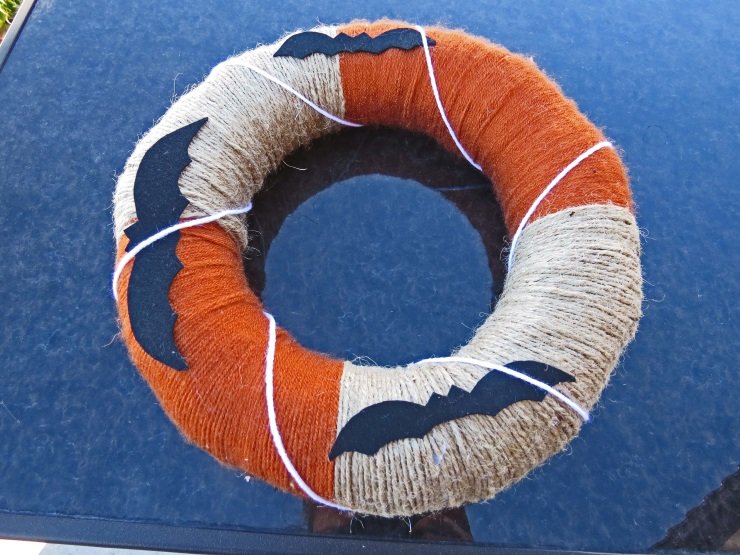
Now you will go back in the opposite direction to make crisscrosses.
Now for the Super Easy Felt Flowers!
Cut a circle out of your felt, it does not have to be perfect. The larger the circle, the larger the flower so try different sizes.
Cut around the Circle until you get to a quarter size circle in the middle.
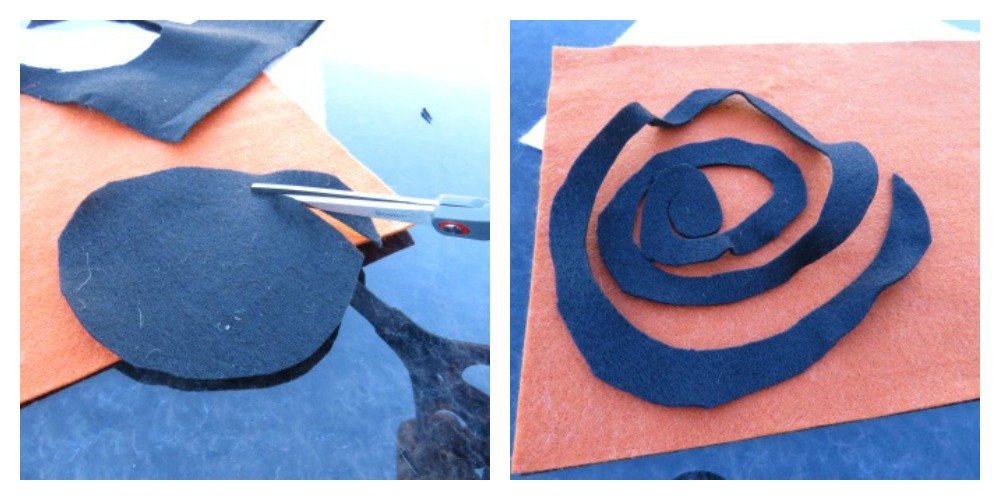
Begin at the end and roll the felt until you get to the middle.
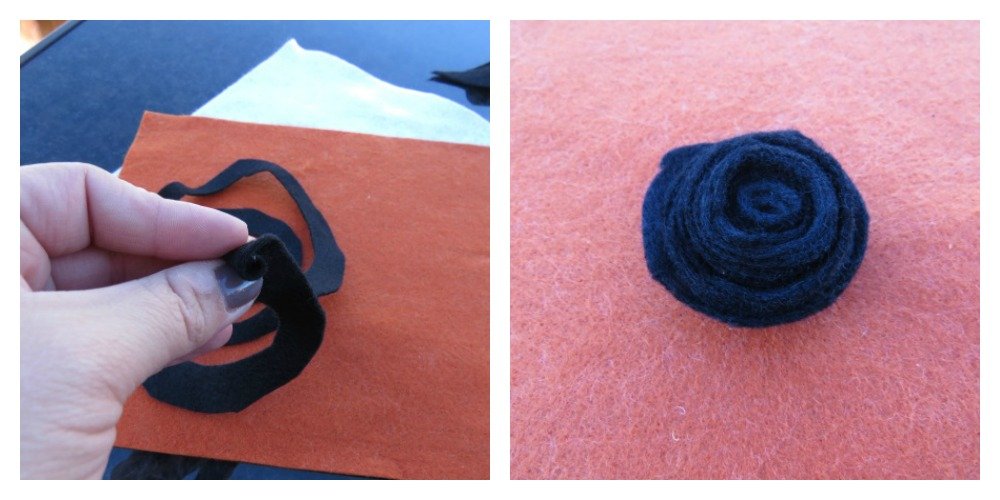
Take hot glue and flip the flower over, apply hot glue to the middle and cover it with the small quarter size circle you have left in the middle.
Repeat the process for as many flowers you’d like.
Hot glue flowers onto the space you left for them. I decided to add a spider to middle of flower to make it extra spooky.
Add a ribbon to hang and Voila!
How do you decorate your house for Halloween?


This is adorable Heather! I’m a sucker for wreaths, twine, and burlap. Those felt flowers are wonderful too. Thanks for the great tutorial!
Me too – I love wreaths!